3D Printing with Taulman Bridge and Other Nylons
Nylon is an amazing material for 3D printing, producing extremely tough parts. However it can be difficult to print well, so this article describes my experience getting to successful prints with Taulman Bridge and Alloy 910 with a LulzBot Taz 6 and PEI bed. These instructions use Cura slicing software, starting from the LulzBot preset for Bridge Nylon. Many thanks to Tom at Taulman 3D for his assistance during this process.
The Problem
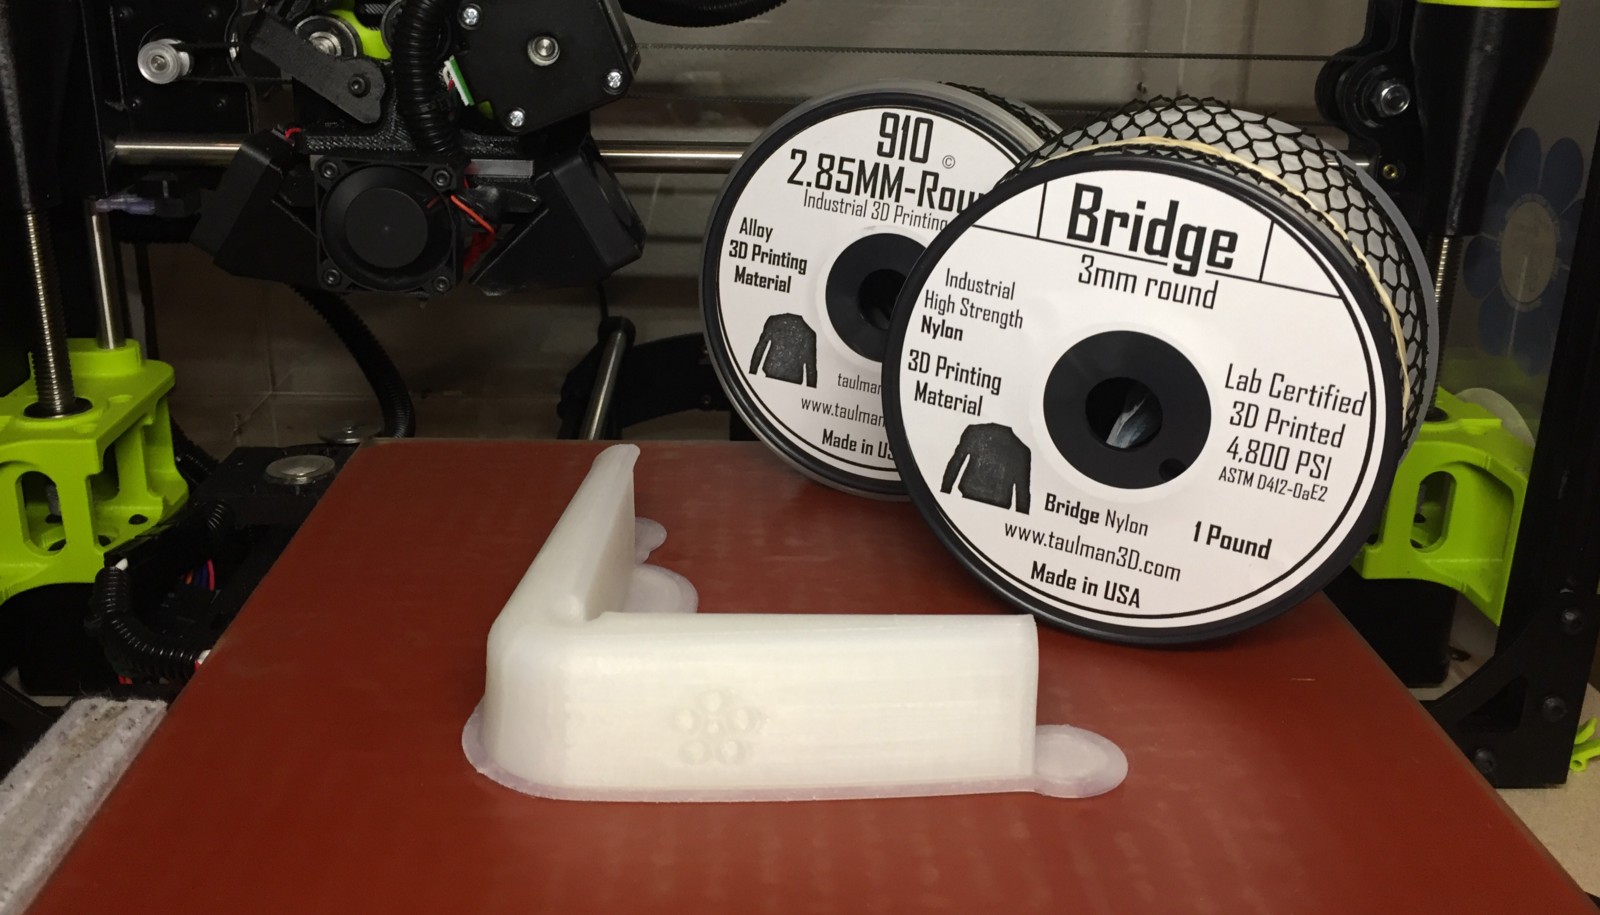
This is what can happen when printing nylon using the default Cura profile on my LulzBot:
Nylon curling from printer bed
The part is distorting as it cools, and curling away easily from the PEI build surface. The bed was heated to 65C and coated with glue stick, as advised in the Cura profile.
Print and Bed Settings for PEI Print Bed
Recommended material settings in Cura for LulzBot Taz 6 Nylons need to be printed at 250–260C. Due to oozing–more on this later–the bed calibration steps on a LulzBot Taz need to happen at a much lower temperature, on the order of 150C. The Taz’s corner probing will fail if nylon is oozing from the hot end. As a result, I recommend loading the filament, cooling to 150C, then cleaning the nozzle with a stiff brush before starting your print.
The Taulman web site indicates 45C and glue stick on a glass bed, but for a PEI surface Tom tells me that temperature needs to be increased to 70–80C and purple glue stick applied.
An additional factor in cooling is the fans on the extruder; on the Taz these are the fans on the side which point at the printed part. These need to be turned off! In Cura select the “Cooling” tab and un-check “Enable Print Cooling.”
Finally, if you have an enclosure, keep it closed for the duration of the print. This will help the nylon cool more slowly and evenly.
Slicer Brim and Designed-In Brims
Cura can add a brim around your design to help it adhere to the build plate, and I’ve found this more helpful than the default skirt. Under the “Build Plate Adhesion” tab, change the type to “Brim” and the width to 5mm or more. Depending on the shape of your part, this may be all you need.
Unfortunately, it wasn’t enough for the large, L-shaped part I was printing. To keep the ends tacked to the build plate I added additional brim pads to my model that were two layers thick, like so:
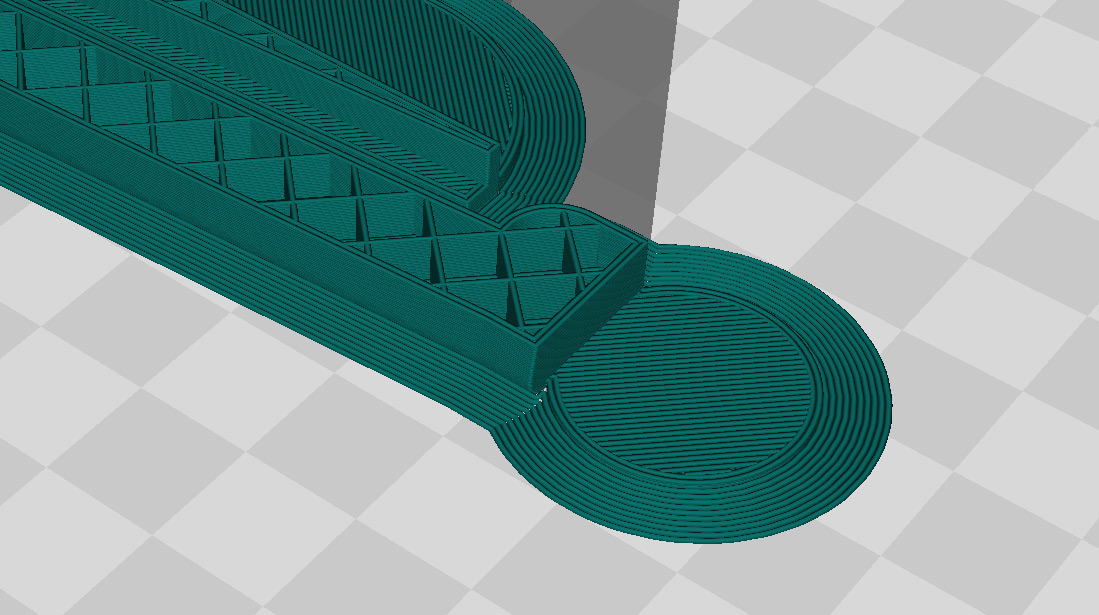
Circular brim pad added to model, plus brim lines added by Cura
This was easy to remove from the print with flush-cut wire cutters. Credit to Clifford Smyth’s excellent book Functional Design for 3D Printing for the idea.
Retraction and Oozing
Once nylon is melted, it likes to stay melted–and thus ooze when the print head is traveling. If travels go outside the part, this can create stringing problems. For many materials, retracting the filament can alleviate this problem, but nylon can ooze through the hot end regardless of retraction.
Instead of using retraction, Cura can keep its travels within already-printed sections, thus keeping the stringing internal to the part. Under the “Travel” tab, set “Combing Mode” to “All.”
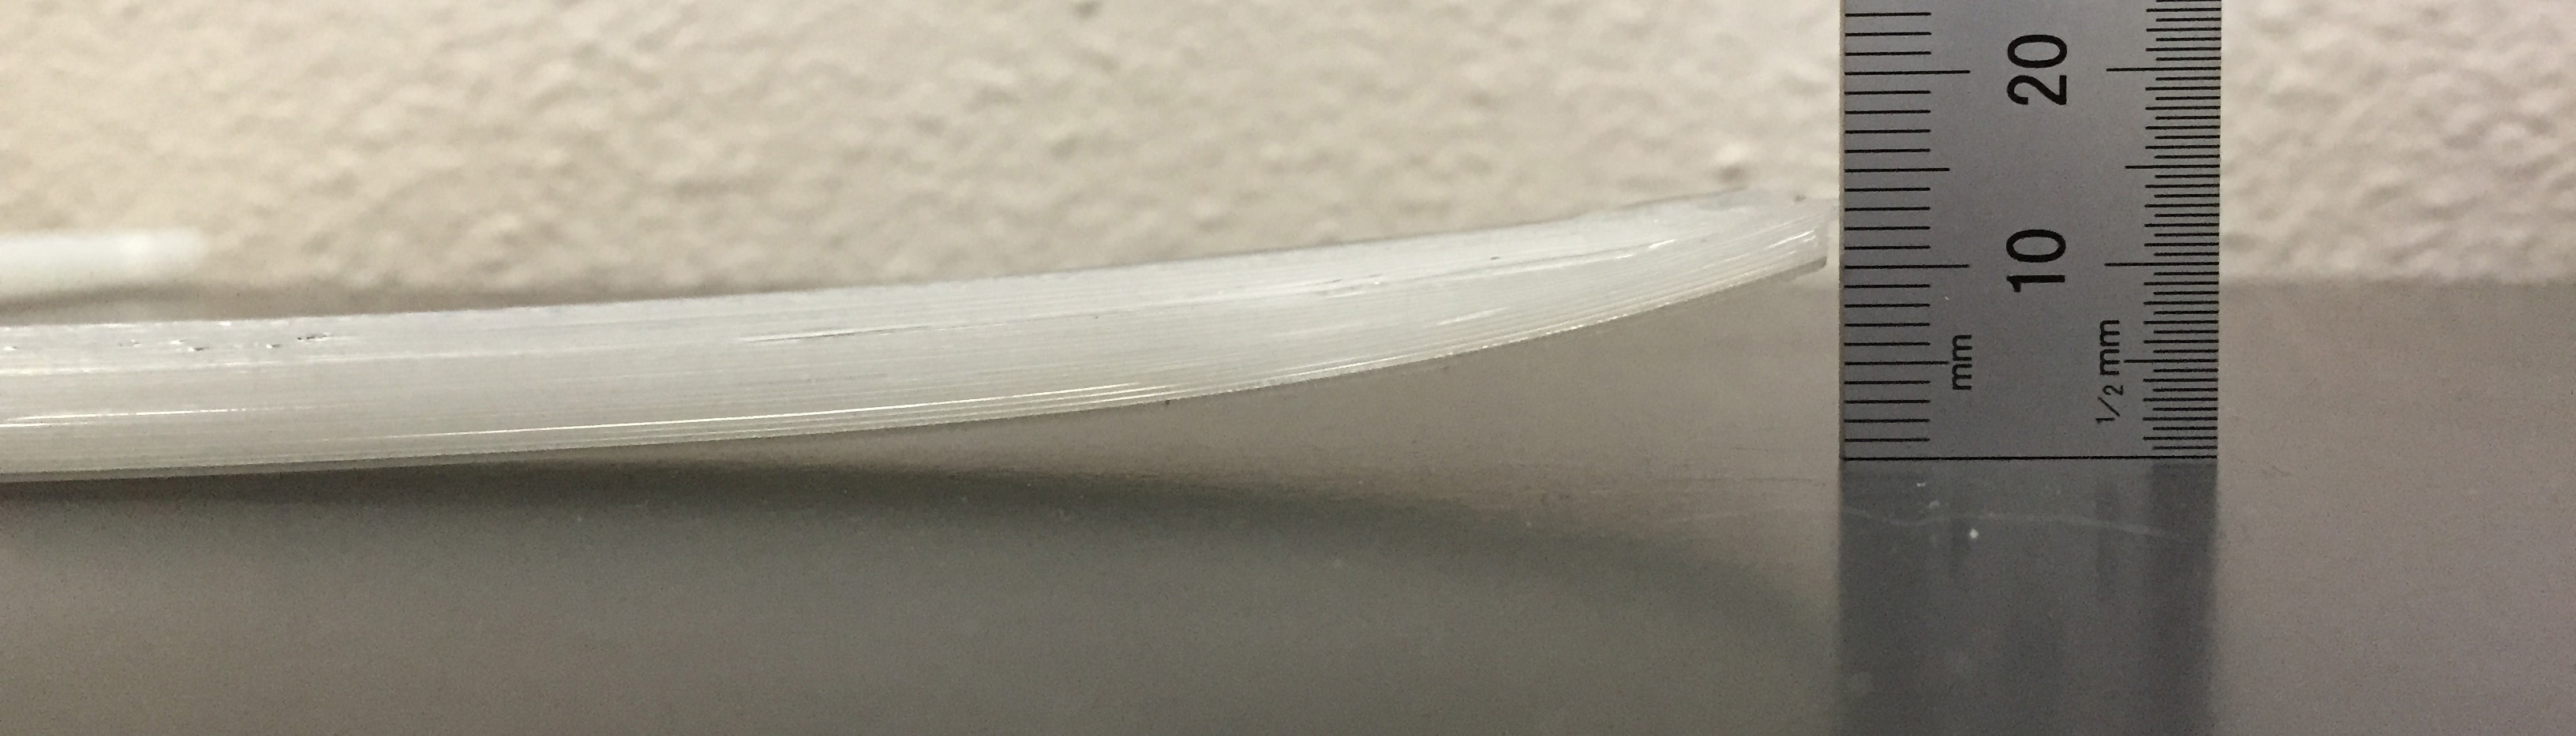
Speeds and Fine Details on First Layer
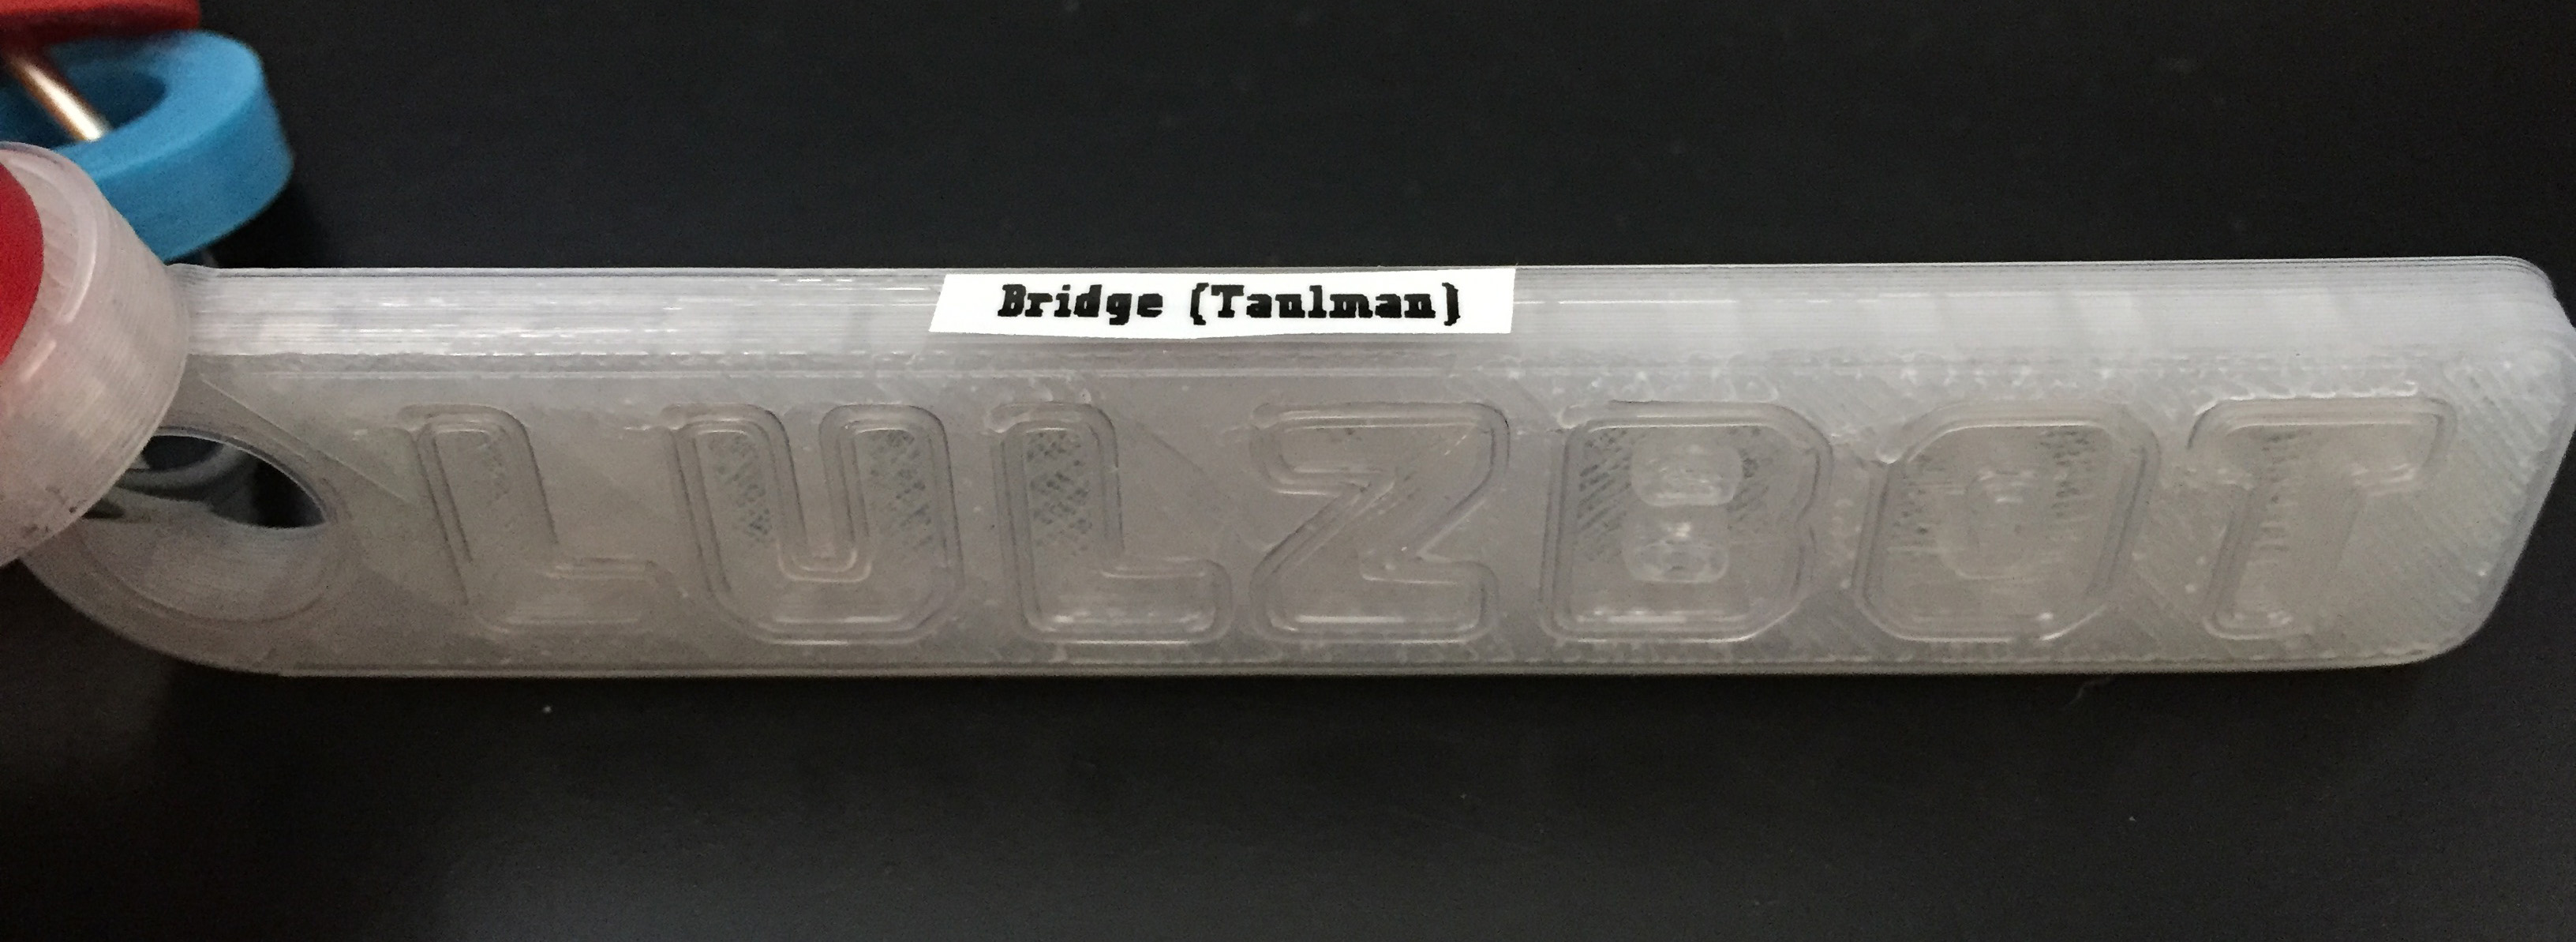
Detail printing with nylon
If your model requires fine details on its first layer, like the lettering on this keychain, you may want to use retraction and also control how quickly the tool head changes direction. In my first test prints, I noticed the tool head would pull oozing filament around when it changed directions.
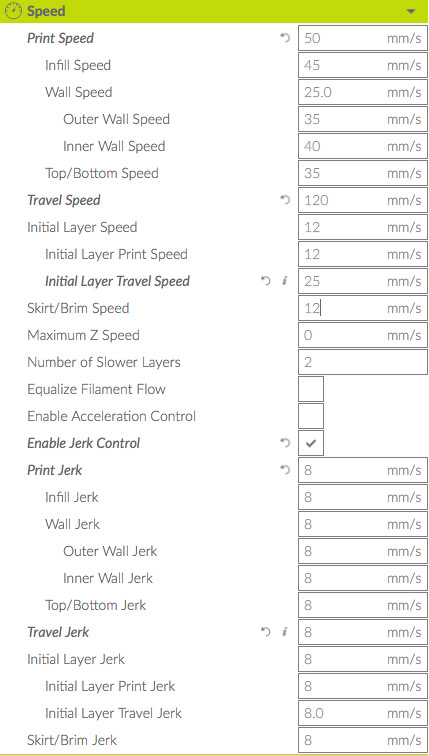
Fortunately Cura has options to help: under the “Speed” tab, check “Enable Jerk Control” and set the print/travel jerk to 8mm/s maximum. This setting, along with 3mm retraction, produced perfect lettering on the first layer.
These speed settings have served me well for a variety of prints with both Taulman Bridge and Alloy 910. They may be slower than strictly necessary, however.
Storage
Nylons will absorb water from the air, causing problems during printing. A food dehydrator and desiccant (like silica gel) can restore nylon before printing. It should be stored in air-tight containers/bags with desiccant between use.
Conclusion
Nylon was frustrating to get started with, but I’m glad I invested the effort to figure it out — the resulting parts are absolutely bomb-proof. Taulman Bridge, in particular, is an excellent combination of low cost and high performance.